
With Halloween just around the corner, celebrating the holiday might be a lot different due to the pandemic. Apart from the usual Halloween costumes and treats, you can still celebrate the spookiest time of the year with creative DIY Halloween decorations you can put around your home.
Here are 8 DIY Halloween Decorations you can easily make in the comfort and safety of your home:
1. Wicked Witch Legs
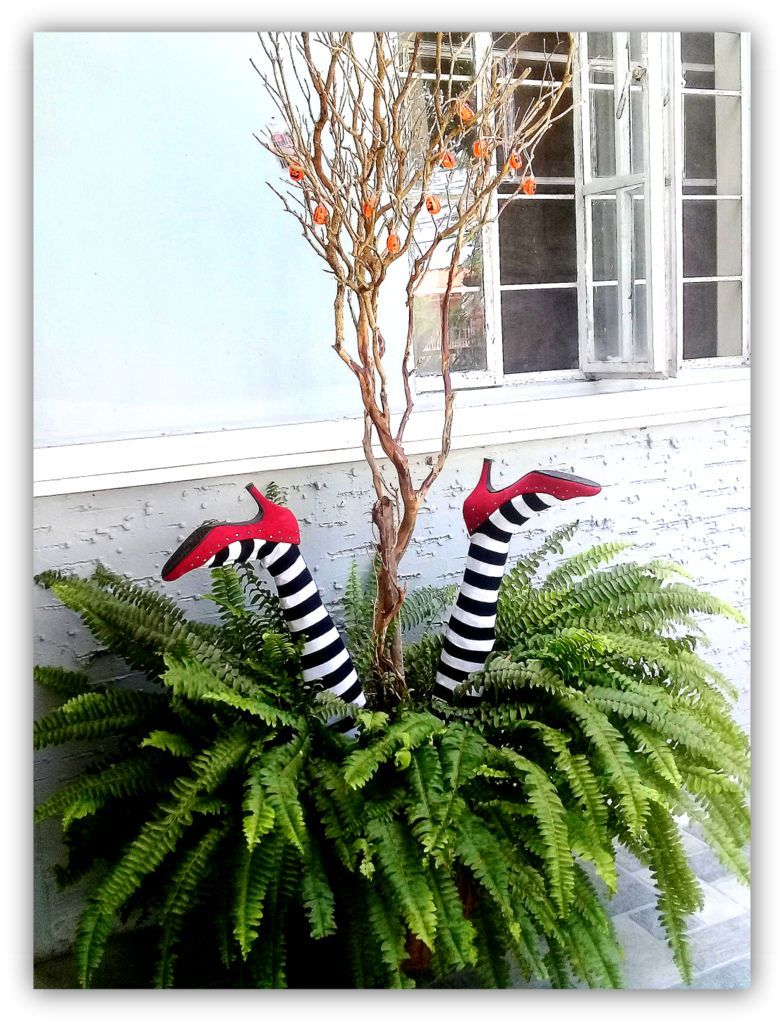
Image from Pinterest
Calling all Wizard of Oz fans: this fun and unique DIY decoration is made for you!
What you’ll need:
Chicken wire
Scrap board
Glue
Newspaper
Spray paint
An old pair of shoes (better if they’re shining red!)
Scrap wood and a pair of long black and white socks
Instructions:
Cut chicken wire to the length of the legs and make sure to add that extra “knee bend”, then use scrap cardboard to create the back section of the leg
Wrap around newspaper to paper mache around the legs and leave them to dry overnight
Cut a small piece of wood to fit inside the shoe. Put it inside the foot part of the sock.
Pull socks into the legs and wear your shoes over them.
Place two pieces of scrap wood into the hedges and flip the legs upside down.
Place them on a big plant pot or outside your house to get that Wizard of Oz feels!
Pro-tip: No black and white socks? Old, white t-shirts work just as fine! Simply cut to size, staple, and paint the stripes. For the wicked witch’s “ruby” slippers, make use of either red glitter tape or cherry red sequins.
2. Vinyl Halloween Door Silhouettes
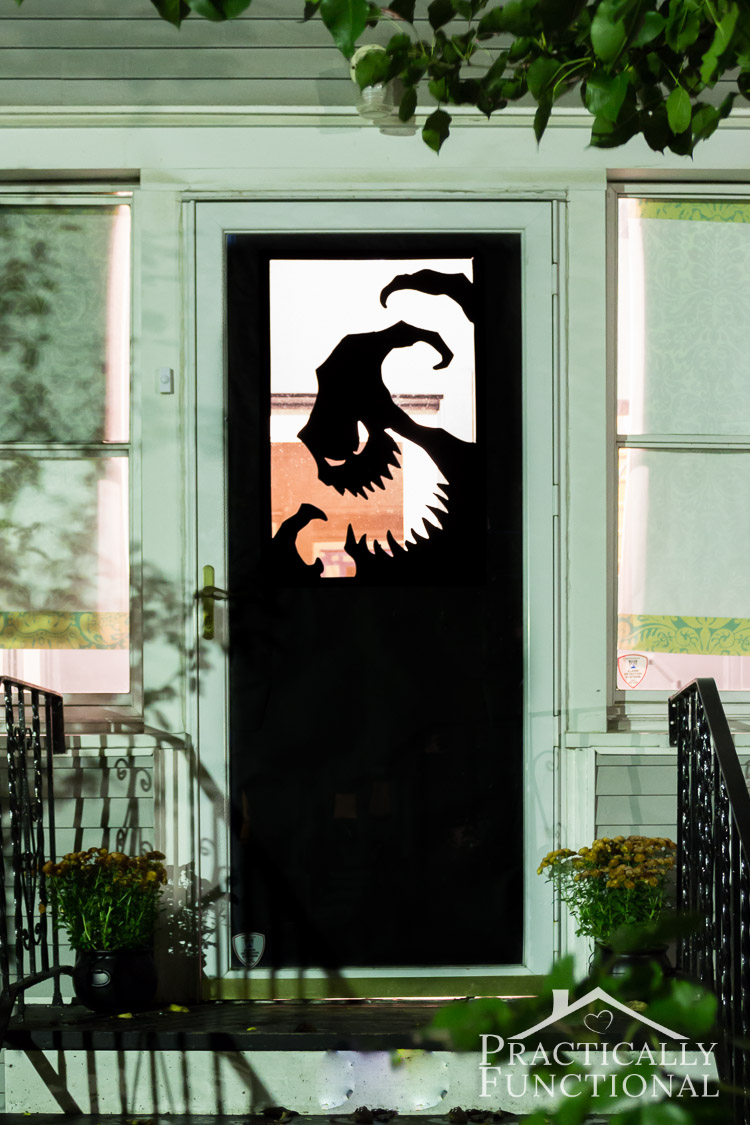
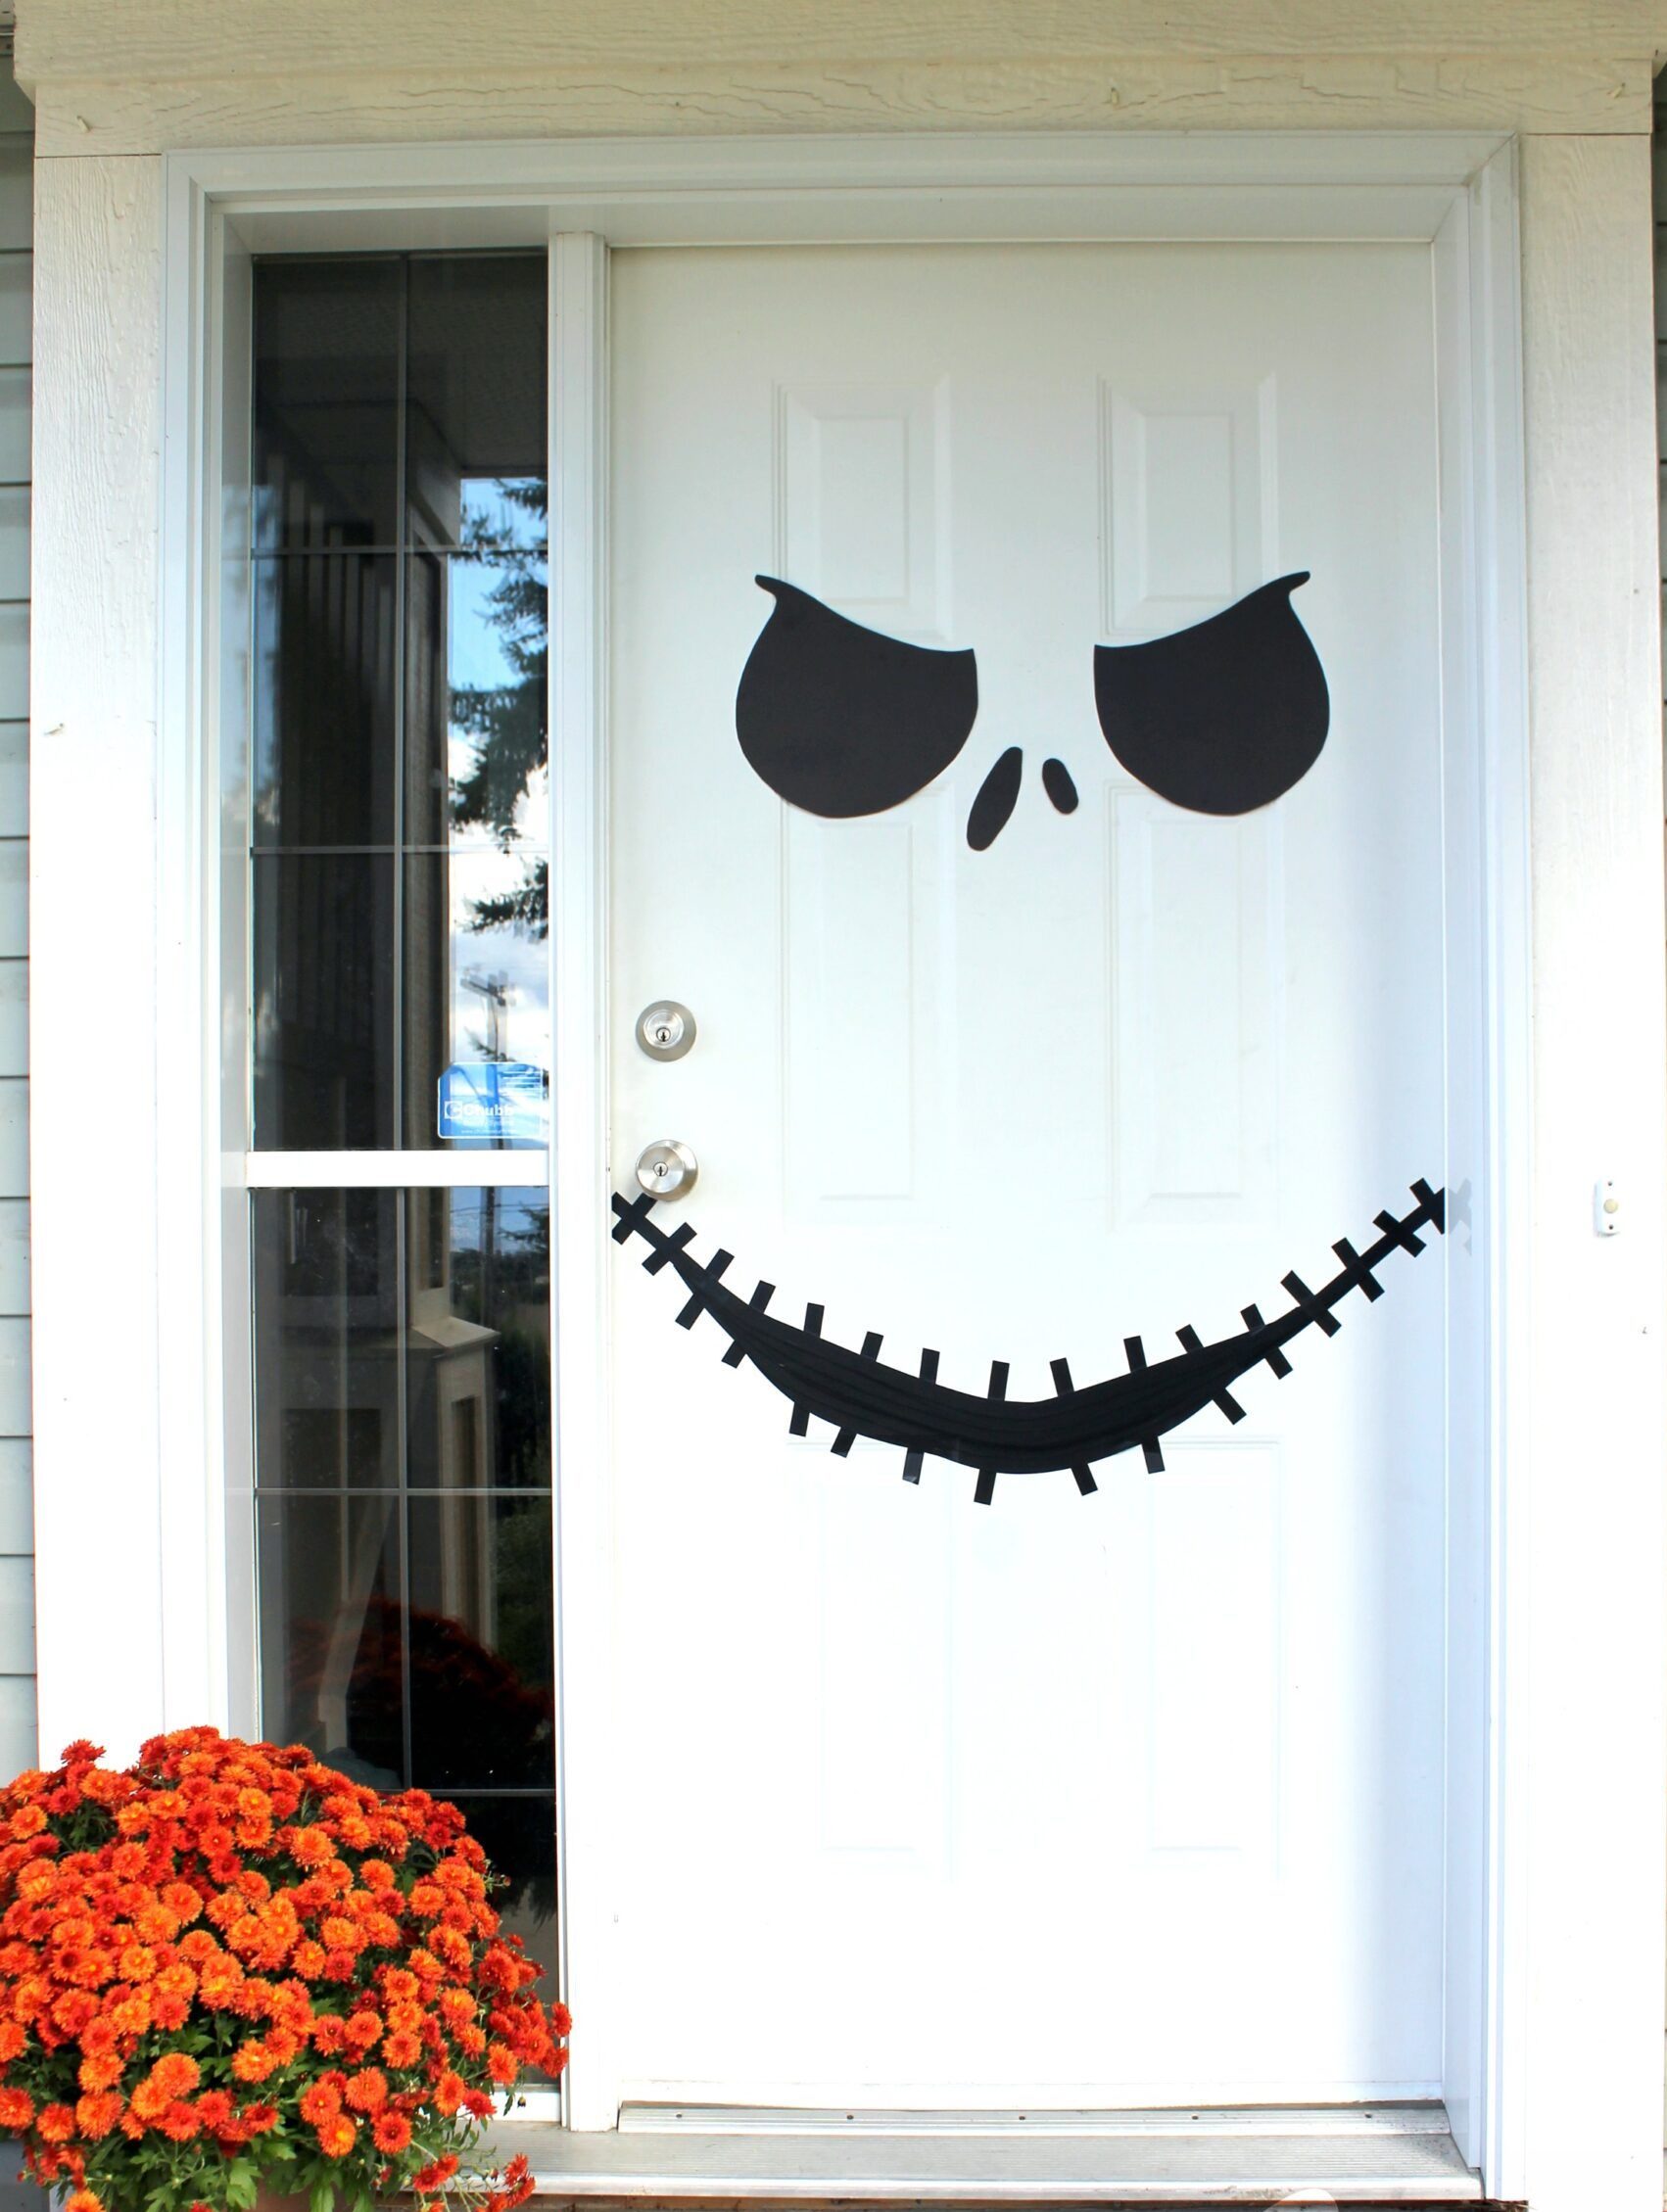
Image from Pinterest
Give passersby a *hint* of the holiday horrors with this easy-to-make door silhouette!
What you’ll need:
Adhesive black vinyl
Scissors
Black paper or any color of your choice
Painters tape
Instructions:
Choose a design that you like and cut it out on the vinyl.
Use your scissors to manually cut your design
Take note: if you plan to place your vinyl decoration from the inside make sure that the design is mirrored before cutting it out
The same applies if you are cutting out letters. Make sure it is plotted reversed before cutting!
Use black paper and tape to cover up extra spaces between the design and the edges of the door or window.
Pro-tip: Take your silhouette design to a whole new level of fear! Use colorless, ultraviolet (UV) paint or marker with UV LED strips for a night-time scare.
3. Snake Curtain Tie Backs
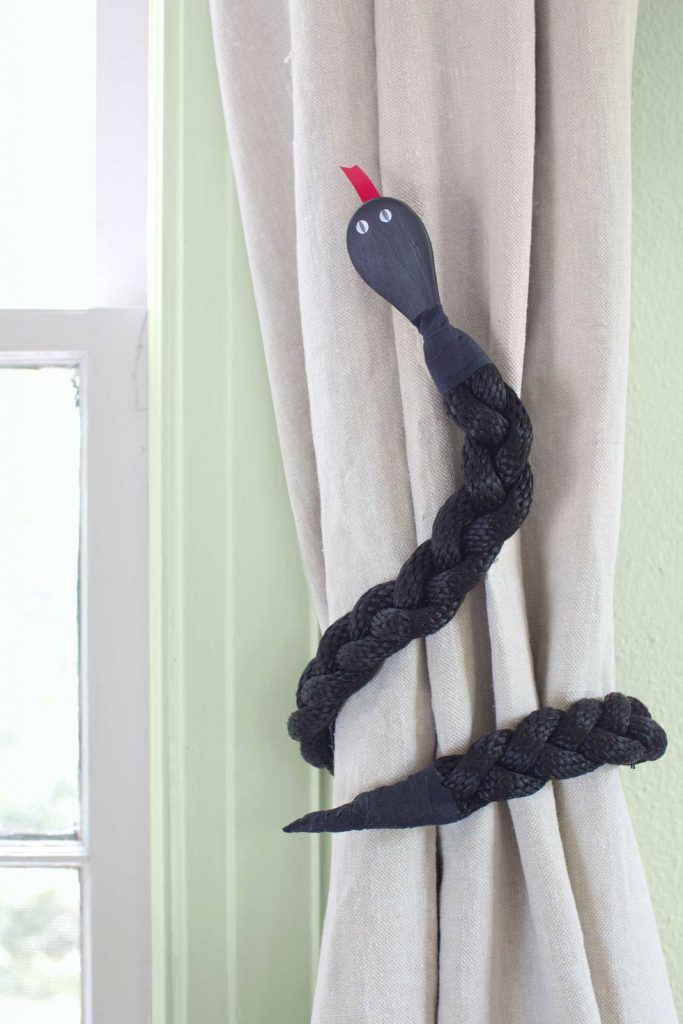
Image from Pinterest
Make the inside of your home a little scarier with this small but spooky detail: Tie your curtains with snakes!
What you’ll need:
Black rope
Black tape
16 gauge steel wire
Wooden spoon
Black paint
White and black pen
Glue
Red ribbon
Instructions:
Braid three pieces of your black rope and secure one end with black tape for a tail.
Secure it with a 16-gauge steel wire to the back with tape
Paint the wooden spoon black. Cut off ¾’s of the handle and tape it to the other end of the rope.
Use your white pen to draw your snake’s eyes and add pupils with a black pen
Glue a strip of ribbon to the end of the spoon.
Tie it around your curtains and you’re all set!
4. Floating Ghosts
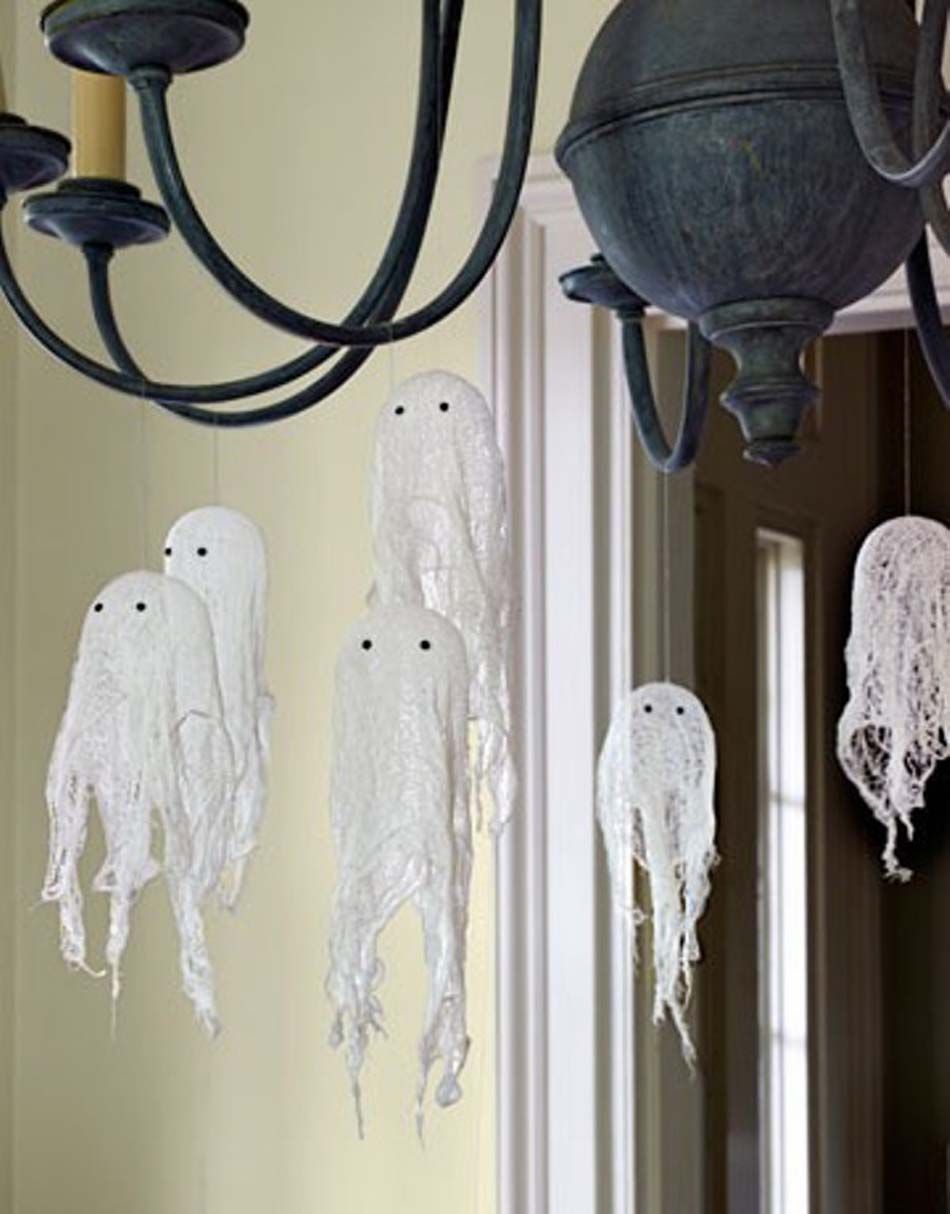
Image from Pinterest
Add these little friendly spirits as your Halloween decor and here’s how to make them:
What you’ll need:
Small paper cups
Small balloons
Cheesecloth or white cloth
Fabric stiffener or white glue mixture
Thread
Instructions:
Stack one small cup atop another that’s turned upside down.
Inflate a small balloon and put the rest in the top cup.
Cut your cloth into pieces that measure around 8 inches square and fill a bowl with fabric stiffener or white glue mixture
Soak in your pieces of cloth and immediately drape them over the small balloon. Let it dry for at least 10 minutes.
Pop the balloon with a pin and it will reveal a hardened shape. Shade in two tiny black circles as your friendly ghosts’ eyes
Remove the ghost from the cup and use your fingers to rough up the ends. Put a thread through your ghost.
Hang them from your ceiling, near doors, and even beside windows.
Pro-tip: Turn your ghosts into death eaters from Harry Potter by swapping out white cloth with black chiffon fabric or crepe paper!
5. Paper Bats

Image from Pinterest
For a simple but instant Halloween vibe, try putting up paper bats on your walls!
What you’ll need:
Black construction paper
Scissors
Double-sided tape
Instructions:
Print out or draw a bat template. You can find one on the internet.
Fold your construction paper in half and lay your bat template on the fold.
Use your template as a guide to cut out your bats.
Stick the tape on the back of each bat and put it on your walls.
6. Cheesecloth Spirits:
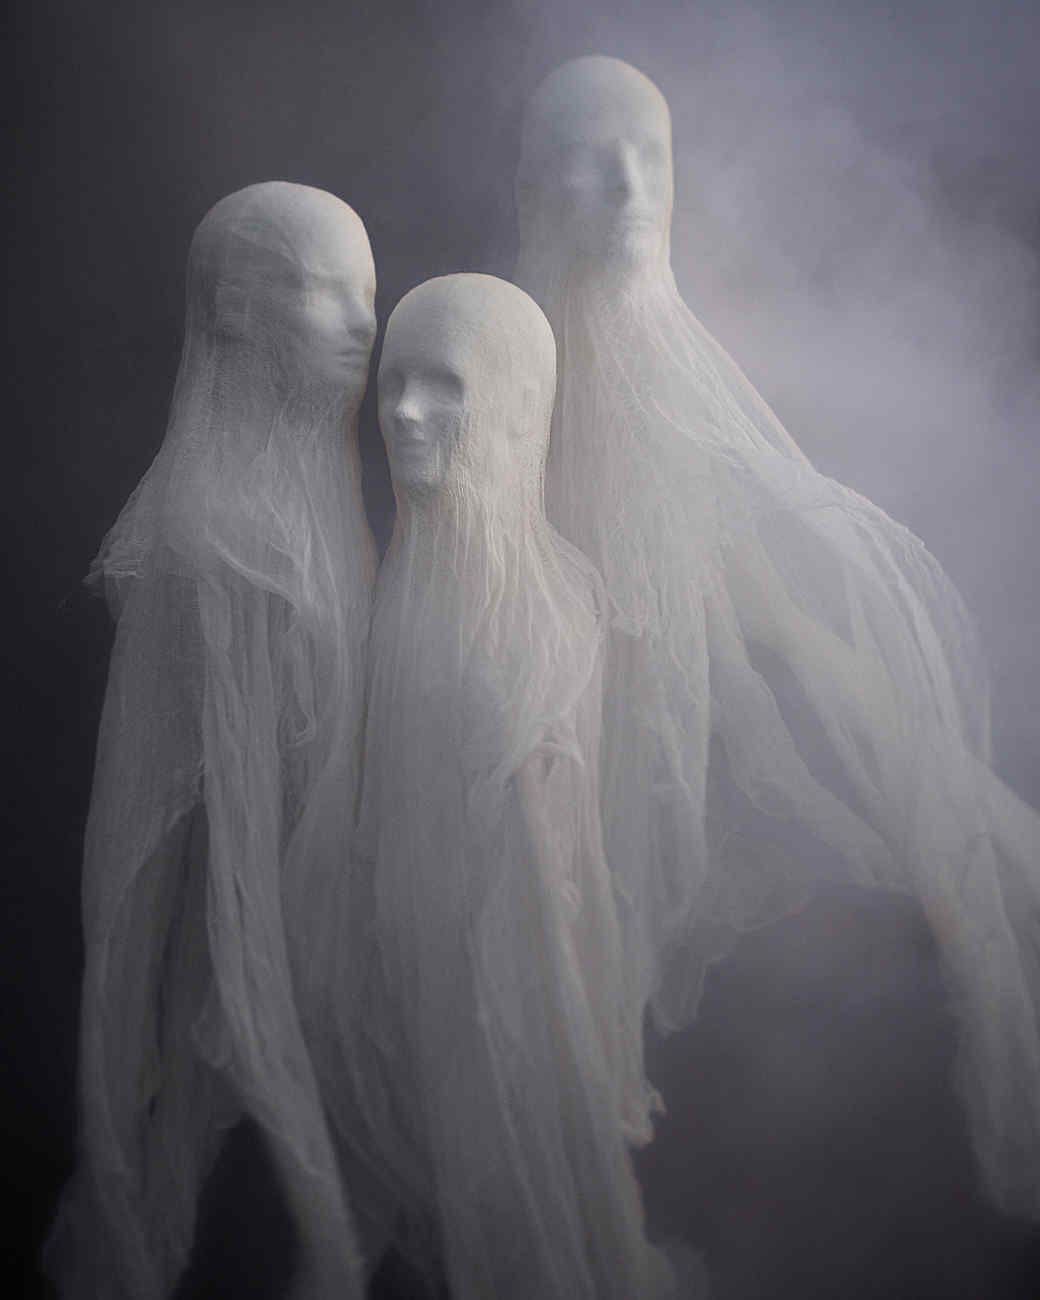
Image from Martha Stewart
Make your home eerie and haunting with these beautiful yet spooky Cheesecloth Spirits.
What you’ll need:
Cheesecloth
Mannequin head
Sponge brush
Watered down glue
Screweyes
Nylon strings
Instructions:
Put a layer of cheesecloth over your mannequin head. Once set, brush over the head and face with glue. Use your hands to smoothen the cloth to define the facial features. Brush up to only the chin, so the fabric beyond would remain loose.
Repeat this process until you have at least 4 layers of cheesecloth. Let dry thoroughly.
Tatter the edges of the cloth using scissors. Attach a screw eye with a bit of glue on the top of the head. Thread with nylon strings.
Pro-tip: Give your ghosts a ghoulish glow with LED lights for a fearful delight!
7. Floating Frames
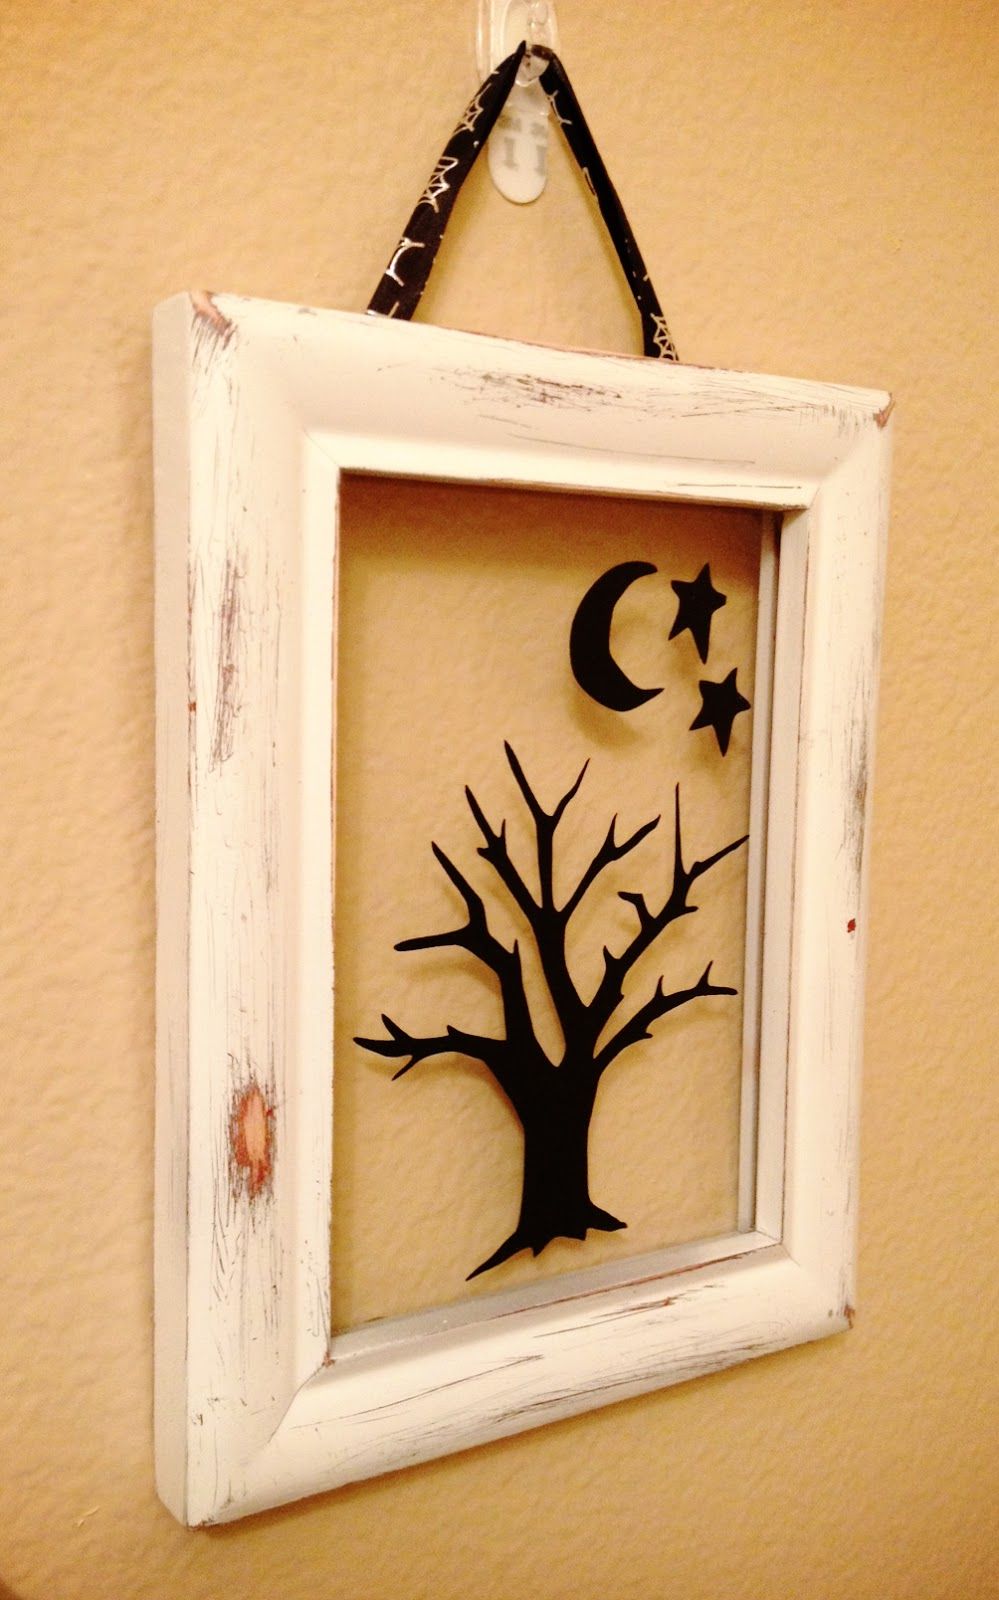
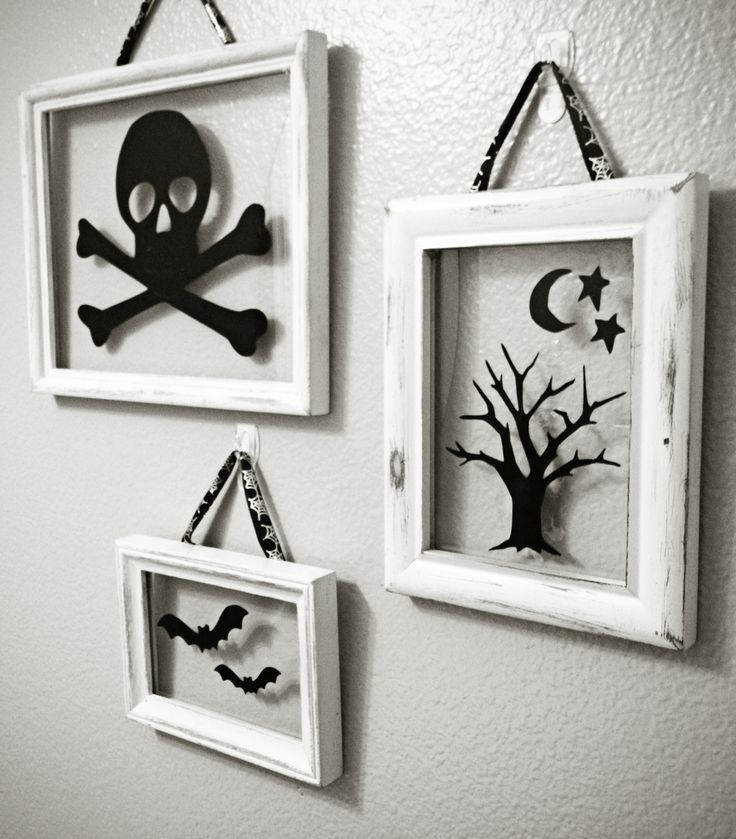
Images from Pinterest
Halloween decorating shouldn’t be expensive! You can repurpose your old frames to make Halloween-themed floating frames.
What you’ll need:
Old frames
White spray paint (or any color of your choice)
Sandpaper
Glue stick
Black vinyl sticker
Ribbon or nylon string
Instructions:
Paint your old frames using spray paint and rough up the edges using sandpaper.
Remove the back of your frame and attach the glass using a glue stick
Using your desired Halloween template design, cut out pieces of vinyl and place them on your frame.
Use a ribbon or a nylon string to hang your floating frames on your walls.
8. Wine Bottle Candle Sticks
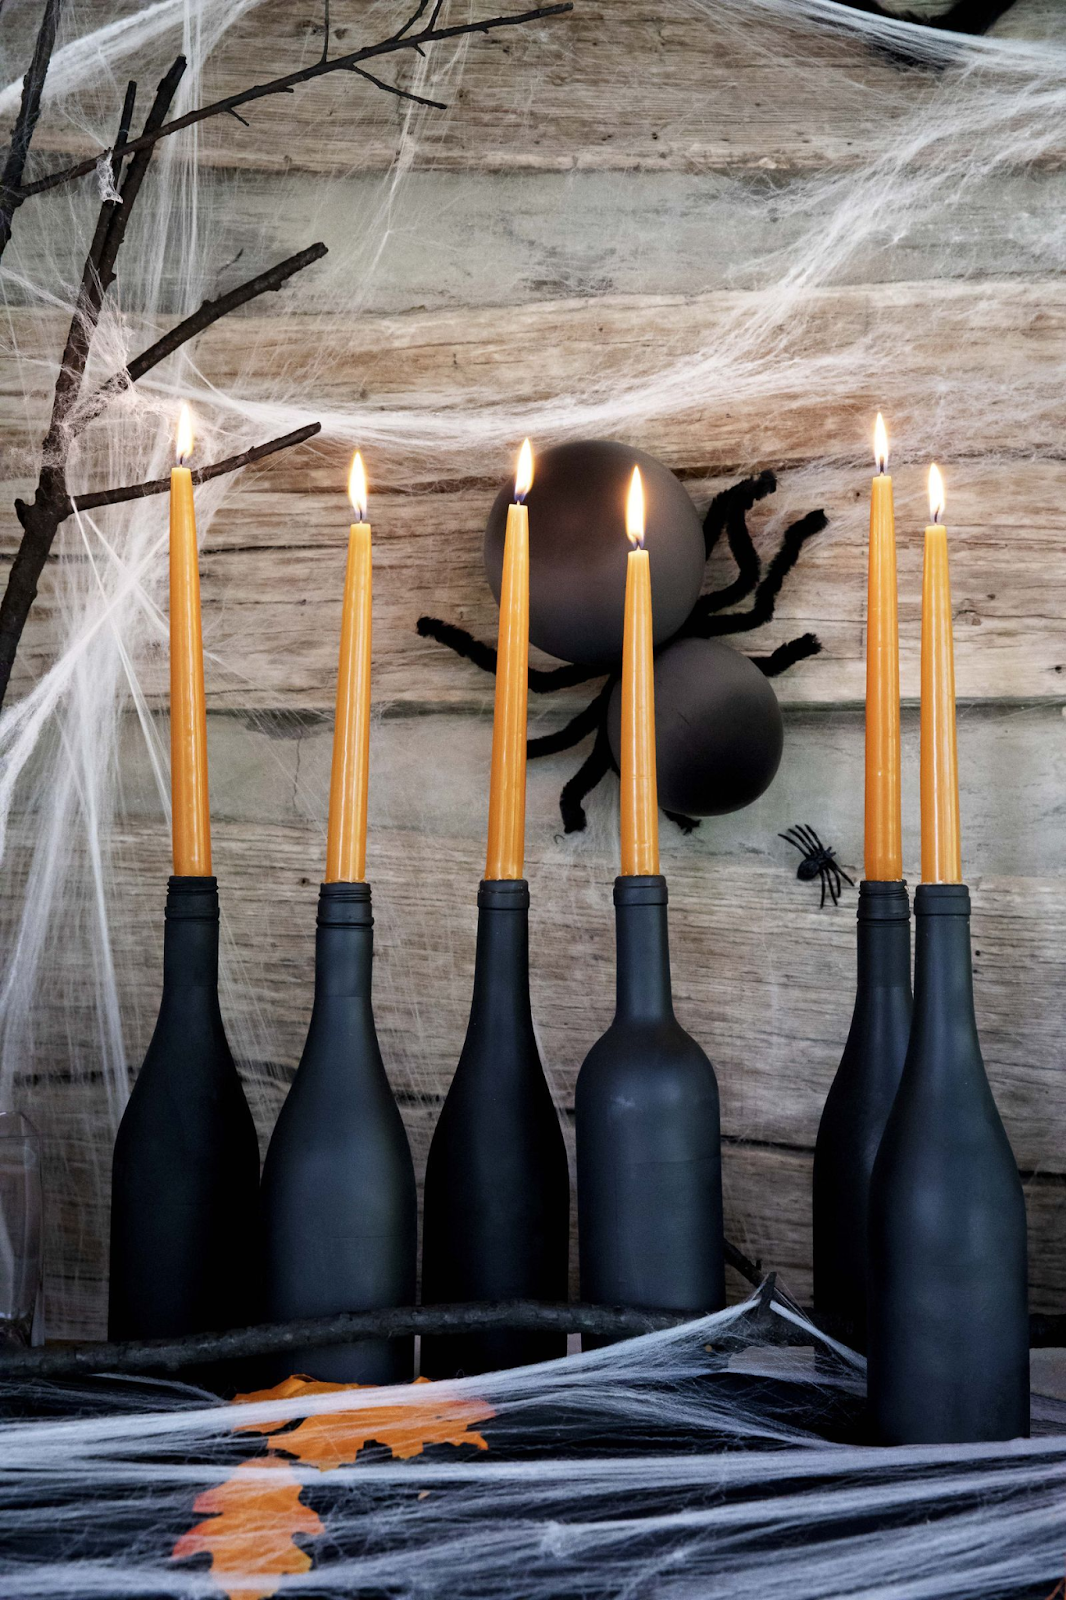
Image from Pinterest
An eerie flicker is a must in every Halloween celebration. Check out these easy tricks on how to make wine bottle candlesticks!
What you’ll need:
Empty wine bottles
Matte spray paint
Candles
Instructions:
Paint wine bottles with matte spray paint.
Once the bottles are dry, insert orange candles or any color of your choice in each bottle opening.
Light your candles and display them in your living room or any common area.
Always remember to burn candles with caution and don’t leave them unattended!
Pro-tip: carve out shallow notches on each candle to turn them into “finger” candles for added creeps!
Whether celebrating at home or outdoors, Halloween can always be special and spooky with a little creative mischief. Happy Halloween!
RELATED ARTICLES:
5 DIY Loft Bed Ideas for Your Small Bedroom
An Easy Guide to DIY Cement Pots
Build a DIY Stone Paver Patio in Just One Day with these 6 Easy Steps
CITATIONS:
Mattox, C. (2021, August), 71 Easy Halloween Crafts You Can DIY to Haunt Your Home This Season, Retrieved from: https://www.countryliving.com/diy-crafts/g1189/best-halloween-crafts-ever/
![]()
![]()


